The backbones of any network infrastructure are servers. These are the workhorses that make our local network and even the internet function. After learning about "The Pros & Cons of a Virtual Server," I got so excited I wanted to make a virtual server for DNS queries. So, I did. And today, you can too!
Since you know how crucial the Domain Name System (DNS) is, let's create a DNS virtual server. As just a backup server. It's easier than you think and it won't cost us a thing. All we need is our computer and two pieces of free software: Ubuntu's Multipass and ISC's BIND 9.
Head's up, although I know what I said in "Don't Be an Admin," for your virtual server to work, you are going to have to be signed into the administrator account.
Optional Step: Enabling Hyper-V
Before getting started, if you are running Windows 10, there is one very important initial step: Turn on Hyper-V. For our DNS server, we are going to spin up a virtual computer. To create a virtual machine (VM), we need to run a hypervisor. While we can install a type 2 hypervisor such as Oracle's VirtualBox,[1] Windows 10 has a hypervisor built-in:
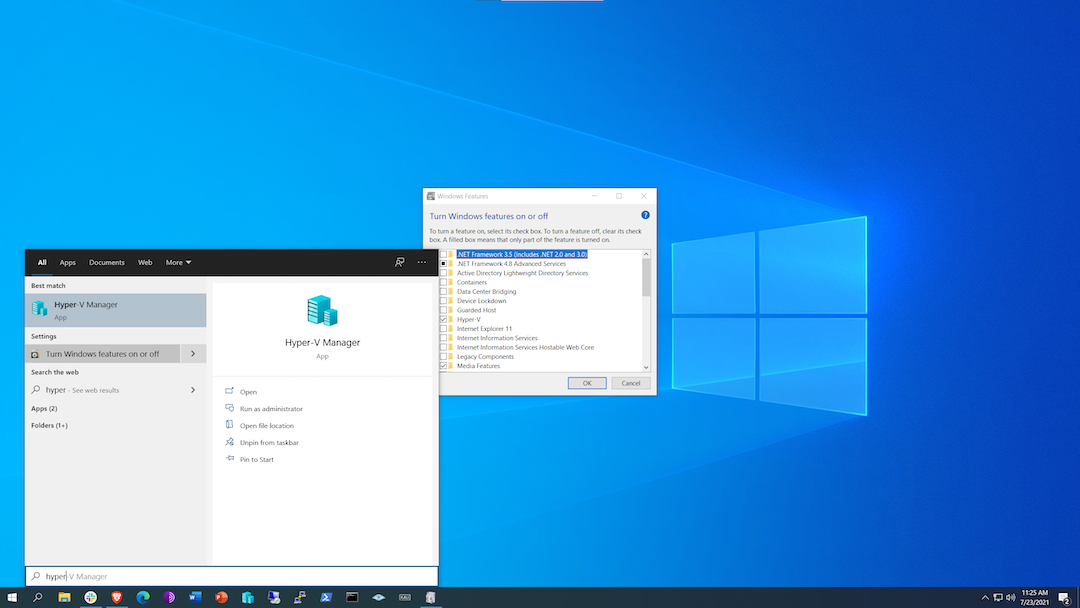
- Click on the Windows icon in the lower-left corner of the screen.
- Type "hyper-v."
- Click on "Turn Windows features on or off."
- Check the box in front of Hyper-V.
- Click "OK."
- Restart your computer.
Step 1a: Installing Multipass
We are now going to create a VM. A hypervisor like Hyper-V will allow us to spin up any number of computers running Windows, Linux, and more. However, the easiest way to create a VM is using a piece of software from Ubuntu called Multipass. And what's great about Multipass is that it works with Windows, macOS, and Linux:
- Click here to install Multipass: https://multipass.run/
- Click the installer once it has finished downloading.
- Click "Next >," "I Agree," "Next >," "Next >," "Next >," "Install," and (eventually) "Finish" to install Multipass.
Step 1b: Running Multipass
Now that it's installed, we need to run Multipass. This program is a little different than any other I've ever used. It starts normal enough: We click on the Windows icon to run our newly installed software. And right at the top, in the Recently added, is the orange circle with a white M of Multipass. Just click that and … nothing happens.
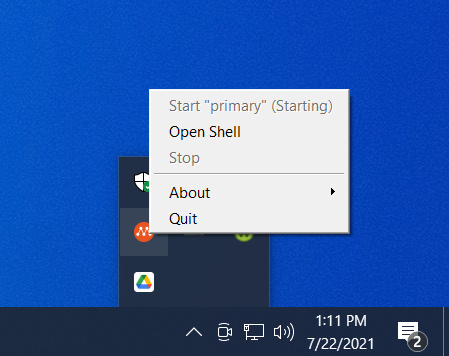
Or so it seems. If you click on the up arrow in the lower right of the system tray, there is that circle M! Now, right-click on it, and click "Open Shell."
Step 2: BIND 9
Now the real fun starts. Right now, we are running Windows PowerShell to control a VM of Ubuntu Linux.[2] To install our DNS server, copy and paste the following:
|
ubuntu@primary:~$ sudo apt update |
Let's break this down. "sudo" here tells the computer to DO something as the Super User, as we explored in "Don't Be an Admin." "apt," an abbreviation for Advanced Package Tool, is the packaging tool for Debian-based Linux distributions like Ubuntu. "update" is the command to download package information from all configured sources.
Now, we can install our DNS program, BIND 9:
|
ubuntu@primary:~$ sudo apt install -y bind9 bind9utils bind9-doc |
The next step is to configure a caching DNS server. To do this we modify the named.conf.options file by entering the following:
|
ubuntu@primary:~$ sudo nano named.conf.options |
This command will open up an editable space in the named.conf.options file. For our purposes, we are going to copy and paste all of this:
|
acl nexgentec { localhost; localnets; };
options { directory "/var/cache/bind";
recursion yes; allow-query { nexgentec; };
dnssec-validation auto;
auth-nxdomain no; # conform to RFC1035 listen-on-v6 { any; }; }; |
To close this space, press Ctrl + X (as if you wanted to cut and paste something). Then hit "Y," and you will return.
Now let's check our work:
|
ubuntu@primary:~$ sudo named-checkconf |
If nothing happened, it's good! While this seems counterintuitive, nothing happening is usually a good thing with Linux. As such, no news really is good news, so if anything does happen, then something went wrong.
Saying nothing happened, just restart BIND 9, and we're done:
|
ubuntu@primary:~$ sudo service bind9 restart |
Lo hicimos! You now possess your very own DNS server.
But don't take my word for it—let's resolve some domain names:
|
ubuntu@primary:~$ nslookup google.com 127.0.0.1 |
"nslookup" is the command to access the Domain Name System and look up the following information. "google.com" is what we are looking up, in this case. However, you can, and should, replace this with whatever website your heart desires. "127.0.0.1" is the loopback or localhost address. It is each computer's address for itself. So, basically, you are telling your computer to ask itself for this information.
Let's check our findings. According to our shiny new DNS server, the IP address for Google (or at least one of them) should be https://142.250.217.238. So, let's enter that address into a web browser like Brave and see what we get …
Tips and Reminders
Don't worry if you stumble along the way. You really can do this!
If you did run into any trouble though, here are some places that I've had pitfalls:
- If Multipass doesn’t install, are you sure that Hyper-V is enabled (or that you've got Virtual Box running)?
- If Multipass doesn't run or it crashes, are you sure you are signed into the admin account on this computer?
- If BIND 9 doesn't work, are you sure you copied and pasted everything correctly?
Computers are very persnickety things. If you missed anything, it won't work right. The good news though is that most often, you can simply go back and repeat a step. If you do hit a snag, reach out to me. I am here for you.
Otherwise, if you have gotten to this point, you did it! You crafted your very own virtual server. And now you can throw any website at it. And in return, your DNS server will spit out the IP address for that website. I'm proud of you.
[1] If you are running macOS, instead of Hyper-V, you will need to install VirtualBox: https://download.virtualbox.org/virtualbox/6.1.24/VirtualBox-6.1.24-145767-OSX.dmg
[2] If this PowerShell seems to not go anywhere—and/or it crashes—double check that you are signed in to the admin account. Multipass will not work in a standard user account.